Table of Contents
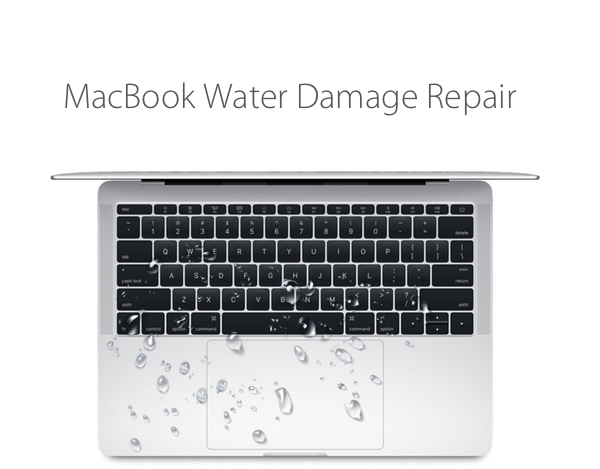
Save laptop from water damage – fast and smart. 🚨 Splash! Your heart races as you watch in horror while liquid cascades onto your laptop. In that split second, your digital life flashes before your eyes. But don’t panic just yet! 💻💦
Water and electronics are mortal enemies, but quick action can be the difference between a close call and a costly disaster. Whether it’s a spilled coffee, an accidental dunk, or a rain-soaked backpack, knowing how to save your laptop from water damage is a crucial skill in our tech-dependent world.
how to save laptop from water damage
saving your laptop after water damage
what to do if your laptop gets wet
Immediate Actions to Take

A. Power off the laptop instantly and save laptop from water damage
When faced with a water-spilled laptop, your first and most crucial action is to immediately power off the device. This step is vital to prevent short circuits and potential irreversible damage to internal components. Here’s a quick guide:
- Press and hold the power button for at least 5 seconds
- If possible, remove the power cable
- Do not attempt to save any work or shut down normally
- Avoid touching any keys or moving the trackpad
| Action | Reason |
|---|---|
| Immediate shutdown | Prevents electrical damage |
| Remove power cable | Eliminates risk of electrocution |
| Avoid normal shutdown | Saves precious time |
| Don’t touch keys/trackpad | Prevents water from spreading |
Also you can check the process here step by step.
B. Remove the battery if possible
After powering off, removing the battery is crucial to prevent further electrical damage. However, this step depends on your laptop model:
- For laptops with removable batteries:
- Locate the battery release latch
- Slide or press the latch to remove the battery
- Place the battery in a dry, safe location
- For laptops with built-in batteries:
- Skip this step and proceed to the next action
- Consider professional help for battery removal later
C. Unplug all connected devices
Disconnecting all peripherals is essential to isolate the water damage and protect other devices:
- Remove all USB devices (mouse, keyboard, external drives)
- Unplug any connected monitors or projectors
- Disconnect any Ethernet cables
- Remove any SD cards or other media
D. Flip the laptop to drain excess water
Positioning your laptop correctly can help minimize water damage:
- Open the laptop to a 90-degree angle
- Turn it upside down, forming an inverted ‘V’ shape
- Place it on a dry, absorbent surface like a towel
- Allow gravity to drain water away from vital components
By following these immediate actions, you’ve taken the first crucial steps in saving your laptop from water damage. Next, we’ll explore effective drying techniques to further mitigate the damage.
Drying Techniques

Use a lint-free cloth to absorb visible moisture
When dealing with a water-damaged laptop, your first line of defense is a lint-free cloth. Gently dab the exposed surfaces, paying special attention to the keyboard, touchpad, and any visible ports. Avoid rubbing, as this may push water further into the device.
Apply compressed air to remove water from crevices
After surface drying, use compressed air to force water out of small openings. Hold the can upright and spray in short bursts to prevent the propellant from entering the laptop.
| Do’s | Don’ts |
|---|---|
| Use short bursts | Tilt the can |
| Keep distance | Spray continuously |
| Target crevices | Ignore warning signs |
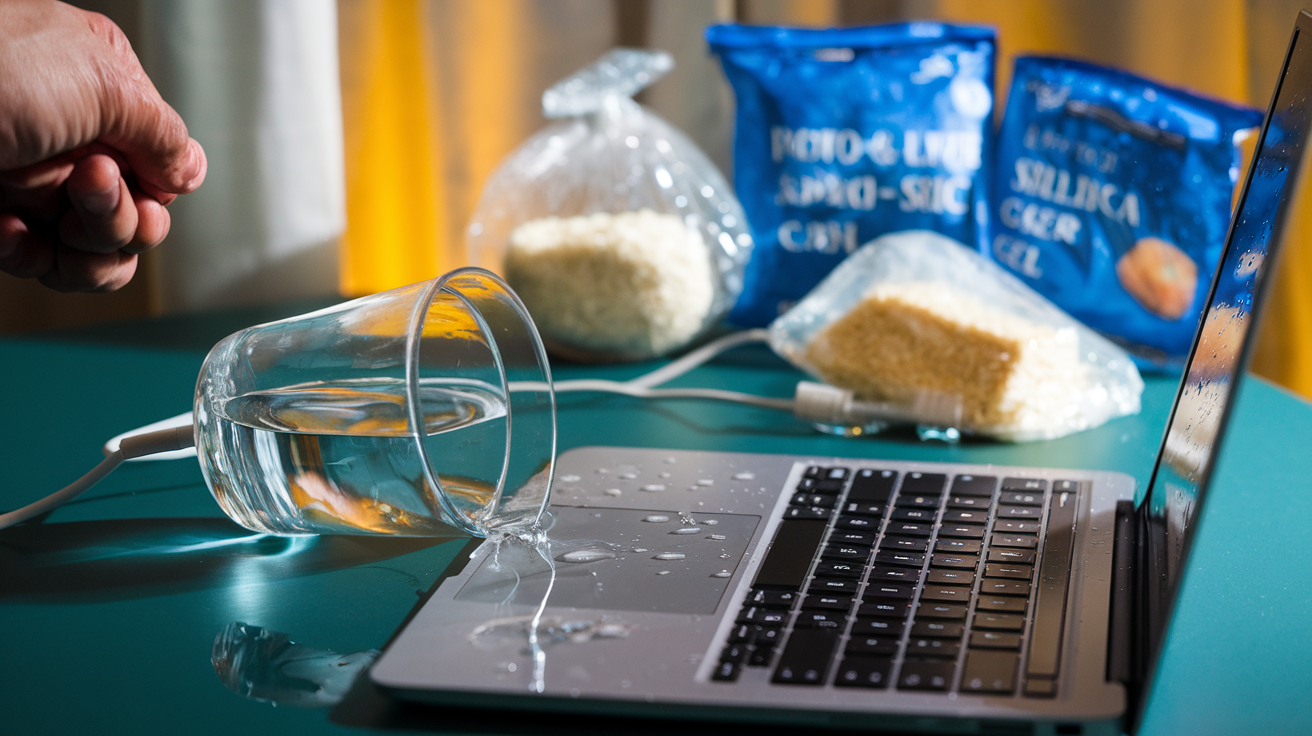
Place laptop in rice or silica gel
• Create a DIY desiccant chamber using uncooked rice or silica gel packets
• Submerge the laptop completely, ensuring all sides are covered
• Leave for 24-48 hours to absorb residual moisture
Use a fan for air circulation
Position a fan to blow cool air across the laptop, enhancing evaporation. This method complements other drying techniques and helps prevent overheating during the process.
Avoid heat sources like hairdryers
While it may seem logical to use heat for drying, avoid direct heat sources. They can cause further damage by:
- Warping internal components
- Melting solder joints
- Pushing moisture deeper into the device
Instead, focus on gentle, room-temperature air circulation for safe and effective drying. With these techniques applied, you’re ready to move on to the crucial step of disassembly and cleaning to address any remaining moisture inside your laptop.
Disassembly and Cleaning
Remove accessible components
When dealing with water damage, it’s crucial to disassemble your laptop to access and clean all affected components. Start by removing the battery, if possible, to prevent any short circuits. Next, carefully remove other accessible parts such as:
- RAM modules
- Hard drive or SSD
- Optical drive (if present)
- Keyboard (on some models)
- Bottom panel or access covers
Always consult your laptop’s manual or online resources for specific disassembly instructions, as the process can vary between models.
| Component | Removal Difficulty | Tools Required |
|---|---|---|
| Battery | Easy | None |
| RAM | Easy | Screwdriver |
| Hard Drive | Moderate | Screwdriver |
| Keyboard | Moderate to Hard | Screwdriver, pry tool |
Clean parts with isopropyl alcohol
Once components are removed, clean them thoroughly using 90% or higher isopropyl alcohol. This solution is effective for:
- Dissolving mineral deposits
- Removing corrosive substances
- Displacing remaining moisture
Apply the alcohol using lint-free cloths or cotton swabs, paying special attention to connectors and circuit boards. For hard-to-reach areas, use a soft-bristled brush dipped in alcohol.
Inspect for corrosion or residue
After cleaning, carefully examine each component for signs of:
- Corrosion (greenish or white deposits)
- Residue from liquids
- Discoloration on circuit boards
Document any damage you find, as this information may be crucial if professional repair becomes necessary.
Allow thorough drying before reassembly
Patience is key in this step. Allow all components to dry completely before reassembling your laptop. This process can take 24-48 hours, depending on the extent of water damage. To expedite drying:
- Use a fan to circulate air around the components
- Place parts in a warm, dry area
- Consider using silica gel packets to absorb moisture
Once everything is thoroughly dry, carefully reassemble your laptop, ensuring all connections are secure. Next, we’ll move on to testing your laptop to assess its functionality after the water damage incident.
Testing and Diagnostics
Perform a visual inspection
Before attempting to power on your laptop after water damage, it’s crucial to conduct a thorough visual inspection. Look for:
- Visible water droplets or moisture
- Corrosion on connectors or circuit boards
- Discoloration or staining on components
Use a magnifying glass to examine smaller components closely. Pay special attention to:
- Keyboard and touchpad
- Ports and connectors
- Ventilation areas
- Battery compartment
| Area to Inspect | What to Look For |
|---|---|
| Keyboard | Trapped water, sticky keys |
| Ports | Corrosion, residue |
| Ventilation | Moisture, debris |
| Battery | Swelling, discoloration |
Attempt to power on the laptop
Once you’re confident the laptop is completely dry, attempt to power it on. Be prepared for various outcomes:
- Normal boot-up (best-case scenario)
- Partial boot with errors
- No response at all
Check for unusual noises or smells
Listen carefully for any abnormal sounds or detect unusual odors:
- Crackling or sizzling noises
- Burning smell
- Chemical odor
These signs indicate potential ongoing damage or short circuits.
Test all functions and components
If your laptop powers on, systematically test all functions:
- Screen display
- Keyboard and touchpad responsiveness
- Wi-Fi and Bluetooth connectivity
- USB ports and other external connections
- Audio input/output
- Battery charging
Document any issues for potential repair or insurance claims. If problems persist, consider seeking professional assistance for a more in-depth diagnosis and repair.
Professional Assistance
When to seek expert help
When dealing with water damage to your laptop, there are certain situations where professional assistance becomes necessary. Consider seeking expert help in the following cases:
- Extensive water exposure
- Failed DIY attempts
- Visible corrosion or component damage
- Valuable data recovery needed
Here’s a quick reference table to help you decide:
| Scenario | DIY Approach | Professional Help |
|---|---|---|
| Minor spill | ✓ | |
| Complete submersion | ✓ | |
| No power after drying | ✓ | |
| Visible internal damage | ✓ | |
| Critical data at risk | ✓ |
Finding a reliable repair service
To find a trustworthy laptop repair service, follow these steps:
- Research online reviews and ratings
- Ask for recommendations from friends or colleagues
- Check for certifications and experience
- Inquire about warranty on repairs
- Compare quotes from multiple services
Costs vs. replacement considerations
When deciding between repair and replacement, consider the following factors:
- Age of the laptop
- Extent of water damage
- Cost of repairs vs. new laptop price
- Performance needs and future-proofing
It’s essential to weigh these factors carefully. In some cases, investing in a new laptop might be more cost-effective than repairing extensive water damage. However, if the damage is minor and the laptop is relatively new, professional repair could save you money in the long run.
Now that we’ve explored professional assistance options, let’s look at some preventive measures to avoid future water damage incidents.
Prevention Tips
A. Use protective laptop cases
Investing in a high-quality, water-resistant laptop case is one of the most effective ways to prevent water damage. These cases act as a barrier between your device and potential liquid hazards. Here’s a comparison of different types of protective cases:
| Case Type | Water Resistance | Impact Protection | Price Range |
|---|---|---|---|
| Neoprene Sleeve | Moderate | Low | $10-$30 |
| Hard Shell Case | High | High | $30-$80 |
| Waterproof Bag | Very High | Moderate | $20-$50 |
Choose a case that suits your lifestyle and offers the best protection for your specific needs.
B. Keep liquids away from work area
Creating a “liquid-free zone” around your laptop is crucial for preventing accidents. Follow these tips:
- Use spill-proof containers for drinks
- Keep a designated beverage area at least arm’s length away from your laptop
- Use coasters to prevent condensation from glasses
- Be extra cautious when eating near your device
C. Invest in water-resistant keyboards
For added protection, consider using a water-resistant keyboard cover or investing in a laptop with a built-in water-resistant keyboard. These accessories can significantly reduce the risk of liquid damage to your device’s internal components.
D. Consider laptop insurance options
While prevention is key, accidents can still happen. Explore insurance options that cover accidental liquid damage:
- Manufacturer’s extended warranty
- Third-party electronics insurance
- Homeowners or renters insurance riders
Now that you’re equipped with these prevention tips, let’s recap the key points we’ve covered throughout this guide to ensure you’re fully prepared to handle any potential water damage situations.
Quick action is crucial when dealing with water damage to your laptop. By following the steps outlined in this guide, you can significantly increase your chances of saving your device. Remember to act swiftly, turn off the laptop immediately, remove external components, and employ proper drying techniques. Careful disassembly, thorough cleaning, and proper testing are essential steps in the recovery process.
While these DIY methods can be effective, don’t hesitate to seek professional help if you’re unsure or if the damage seems severe. Ultimately, prevention is the best strategy. Keep liquids away from your laptop, use protective covers, and be mindful of your surroundings to avoid potential water damage in the first place. By taking these precautions and knowing how to respond in an emergency, you can protect your valuable device and the important data it contains.
Still not turning on? Time for professional help. At Leher Computers, we specialize in laptop water damage repair and can help save your device—even if it seems dead.
📍 Check out our Laptop Repair Services in Dubai.
🛠️ Need data recovery? Visit our Data Recovery Services page.